Astrophotography is the name given to photography of astronomical objects and areas of the night sky, including stars, planets and nebulae. The first photographs of the Moon were taken in the 1840s; there are some early examples in the Science Museum Group collection. Today, developments in technology mean it’s much easier to capture fantastic images of astronomical objects—even with the camera in your phone.
In this post, we’ll look at how you can get started with astrophotography, from some of the simplest things to capture—noctilucent clouds and star trails—to the slightly more complex areas of lunar, planetary and Deep Space Object (DSO) imaging.
Noctilucent clouds
Noctilucent clouds are the highest clouds in the Earth’s atmosphere. They are sensitive to both global climate change and solar/terrestrial influences. Scientists now believe that these clouds are very sensitive indicators for what is going on in the atmosphere at higher altitudes. But they are also very pretty and easy to photograph!
Just set your camera to auto expose, point and click. You can also try to identify the cloud formations.
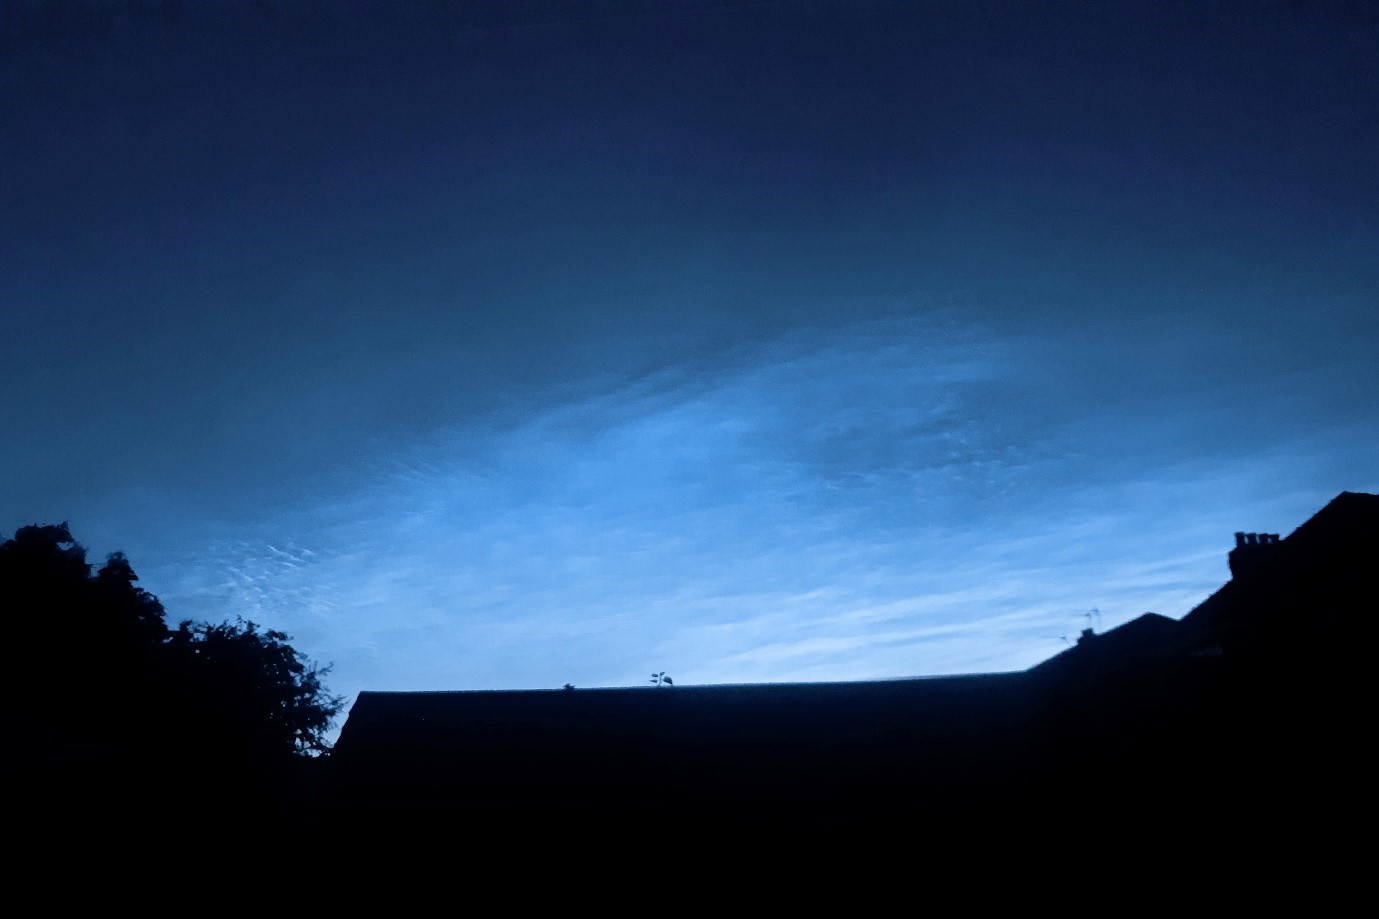
Spring and early summer are the perfect times to see these beautiful formations, so get outside and get imaging—look towards the north about 90 minutes after sunset.
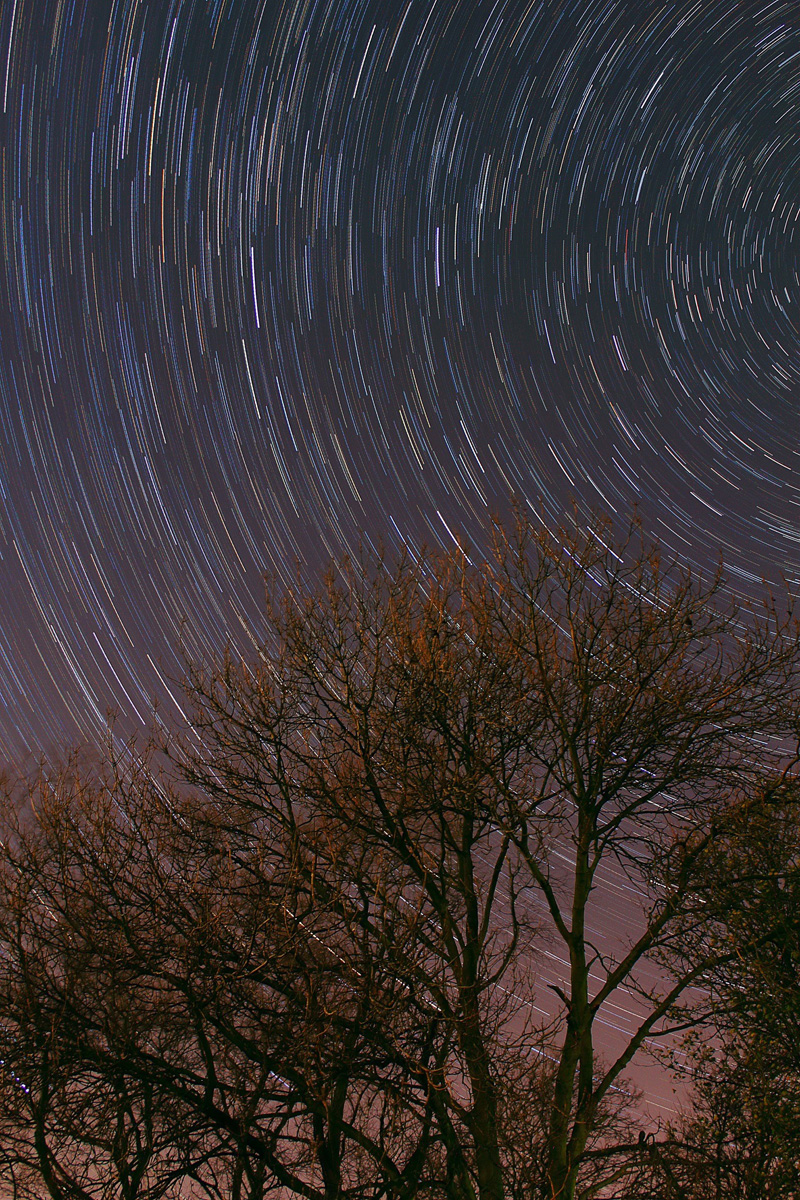
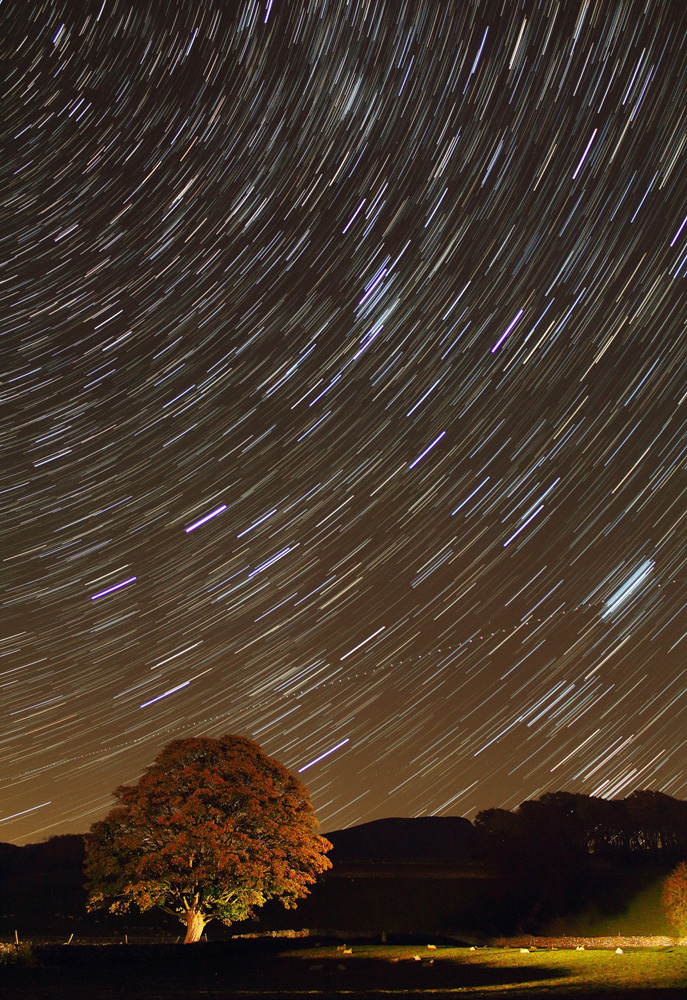
Star Trails
Star-trails are another easy(ish) thing to photograph. The only requirement is that your camera or phone can take long exposures.
To get going, just fix your camera to a sturdy tripod or table-top, point to a nice area of sky and open the shutter. To avoid camera shake, try the ‘black hat’ method: cover the lens with a thick hat or similar material, start the exposure, then (when the camera has shopped shaking) remove the hat. Expose for around 30 minutes and do the reverse ‘black hat’ procedure to finish. Simples!
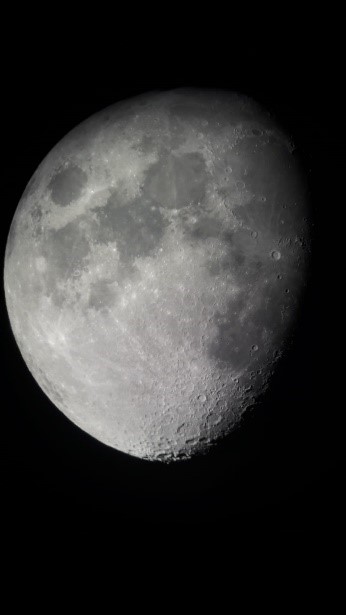
Lunar Imaging
Our Moon is the largest and brightest celestial body in the night sky—so imaging it is relatively straightforward. If you have access to a telescope (perhaps at your local astronomy society), you can use your mobile phone pressed up near to the eyepiece to capture excellent images. It does take a little trial and error (and luck) to get it in focus and to press the exposure button at exactly the right time—but you will be amazed at the result!
Planetary Imaging
This is where it starts to get a little bit technical…!
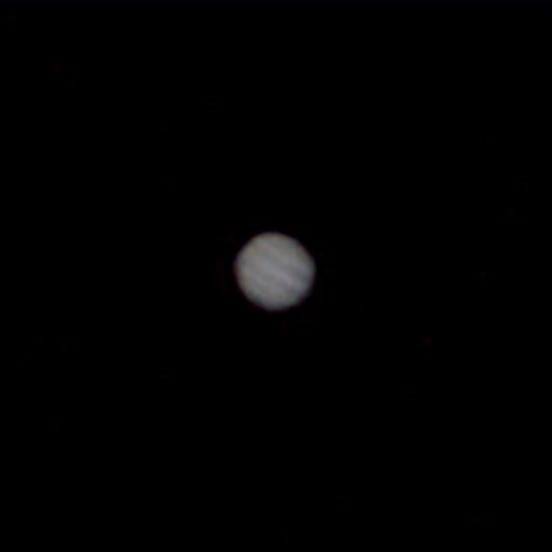
Some of our nearest planets are actually quite easy to see with the naked eye. They can be so bright that we mistake them for just another star. Because they are so bright, many can be imaged in the same way that you imaged the Moon: telescope + mobile phone!
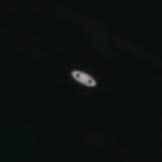
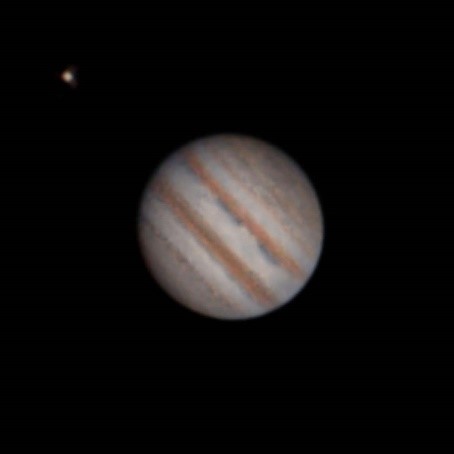
If you catch the planetary imaging bug, you may want to progress to taking high-resolution images that show more detail in the rings of Saturn or the bands of Jupiter. For that, you will need a high-powered telescope and a dedicated planetary camera or modified webcam.

Using something like this and free software from the internet, you can obtain results comparable to those that, just a few years ago, could only be obtained by professionals.

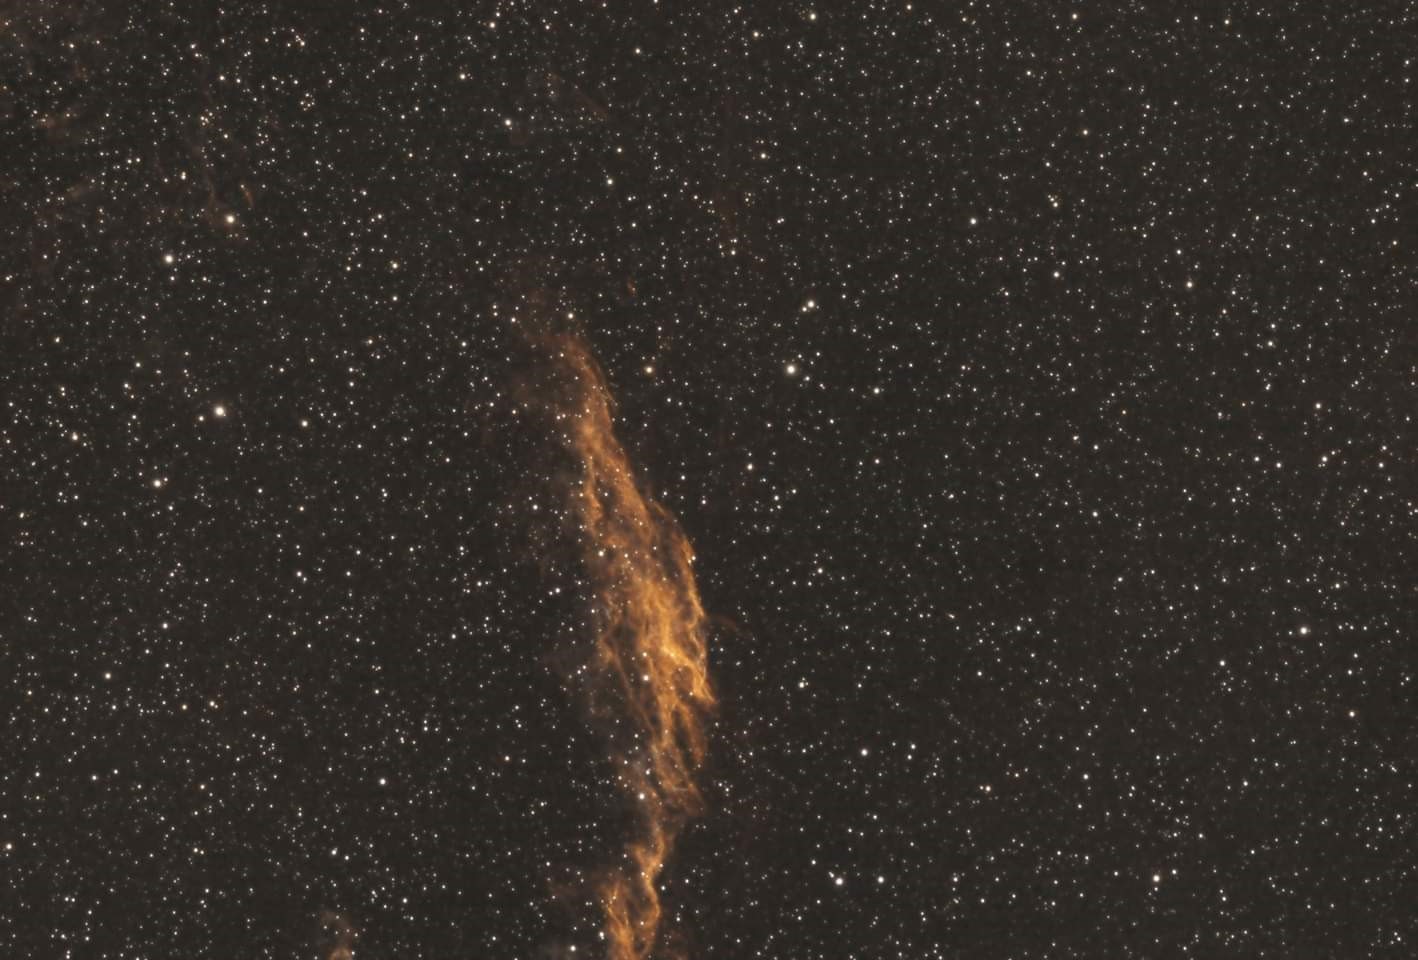
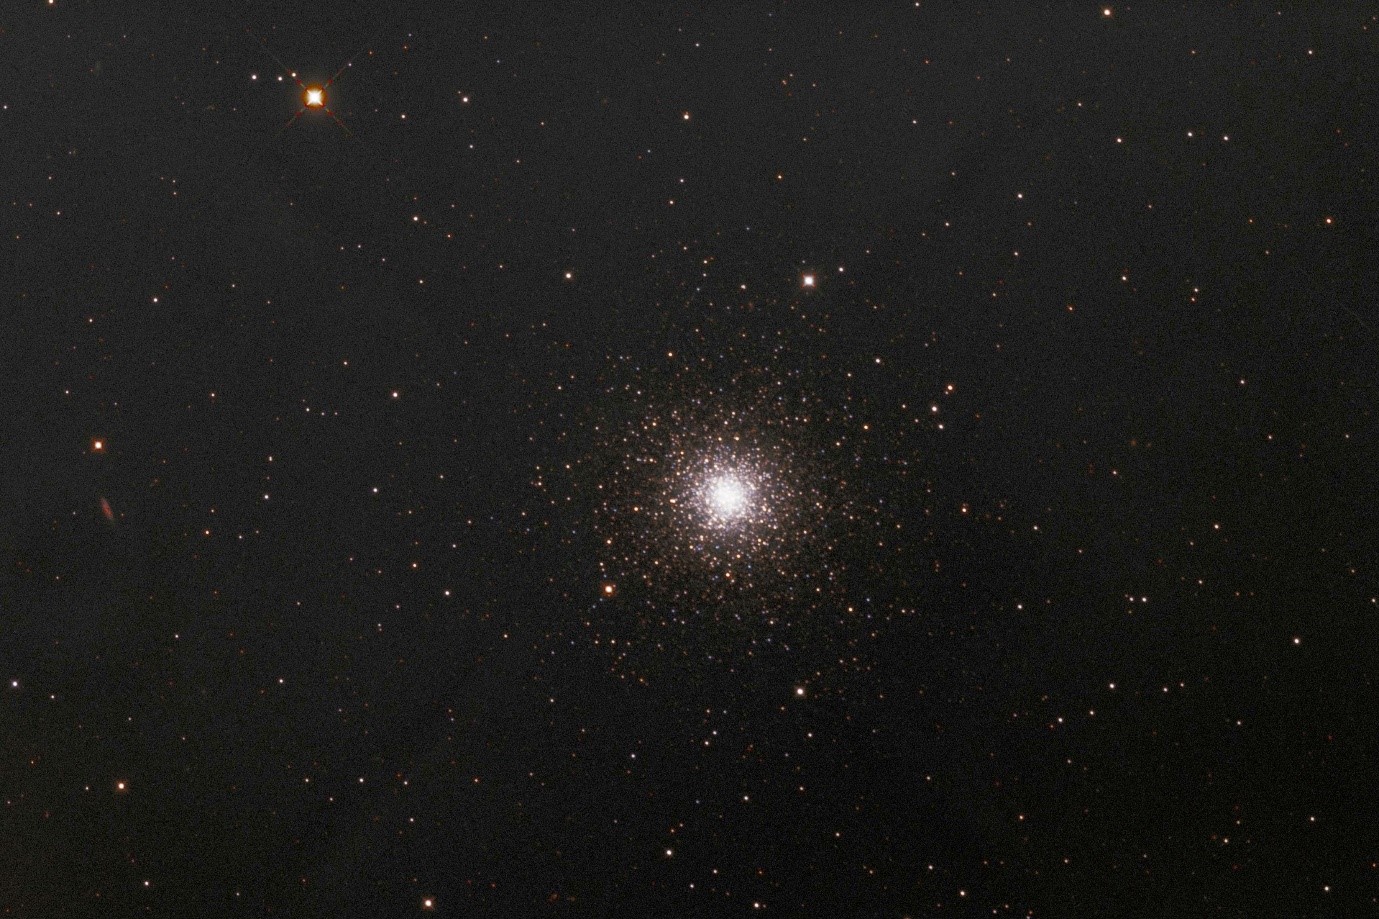
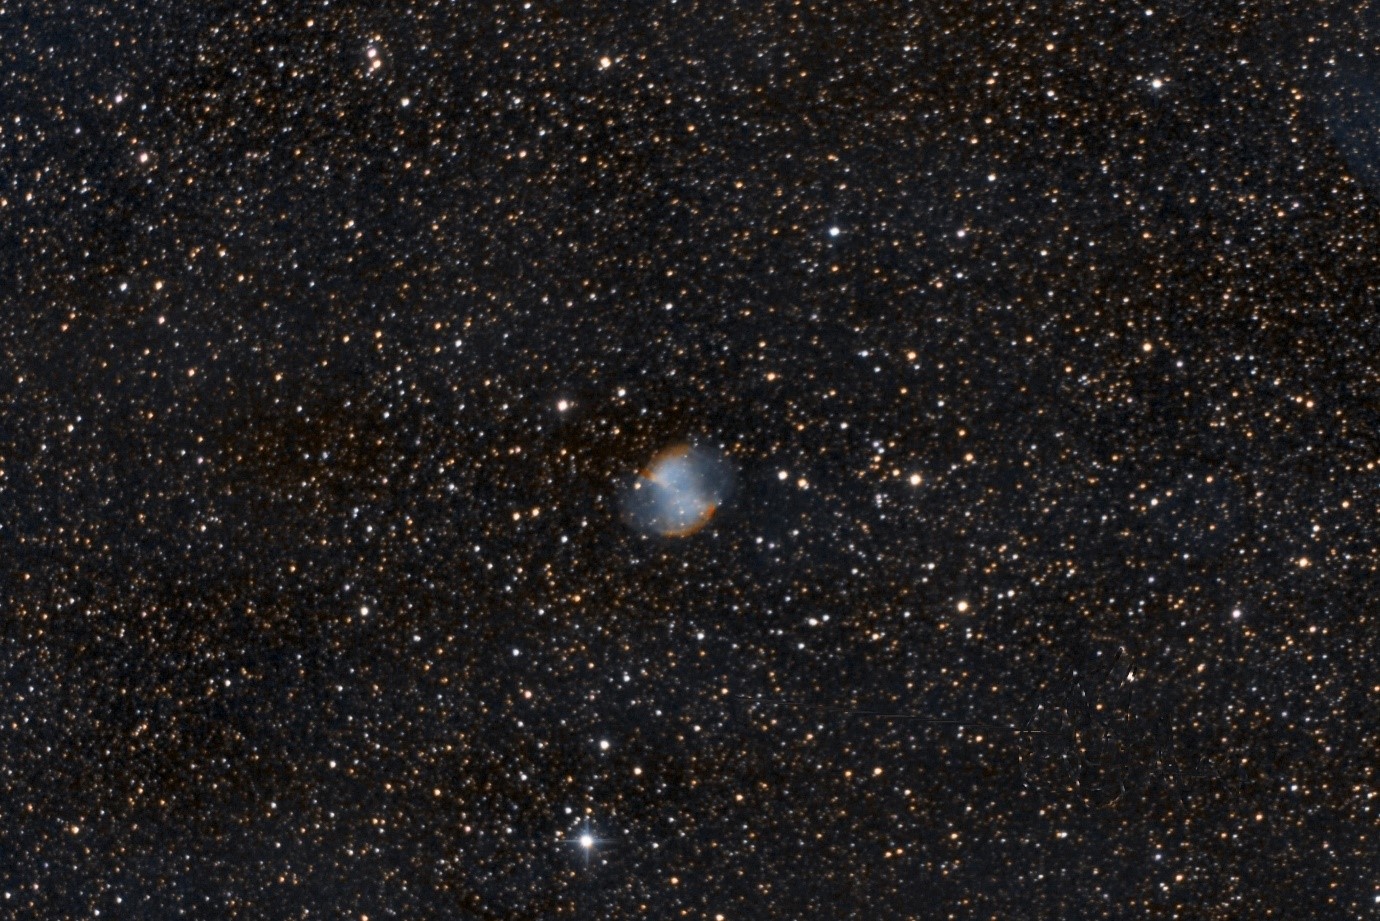
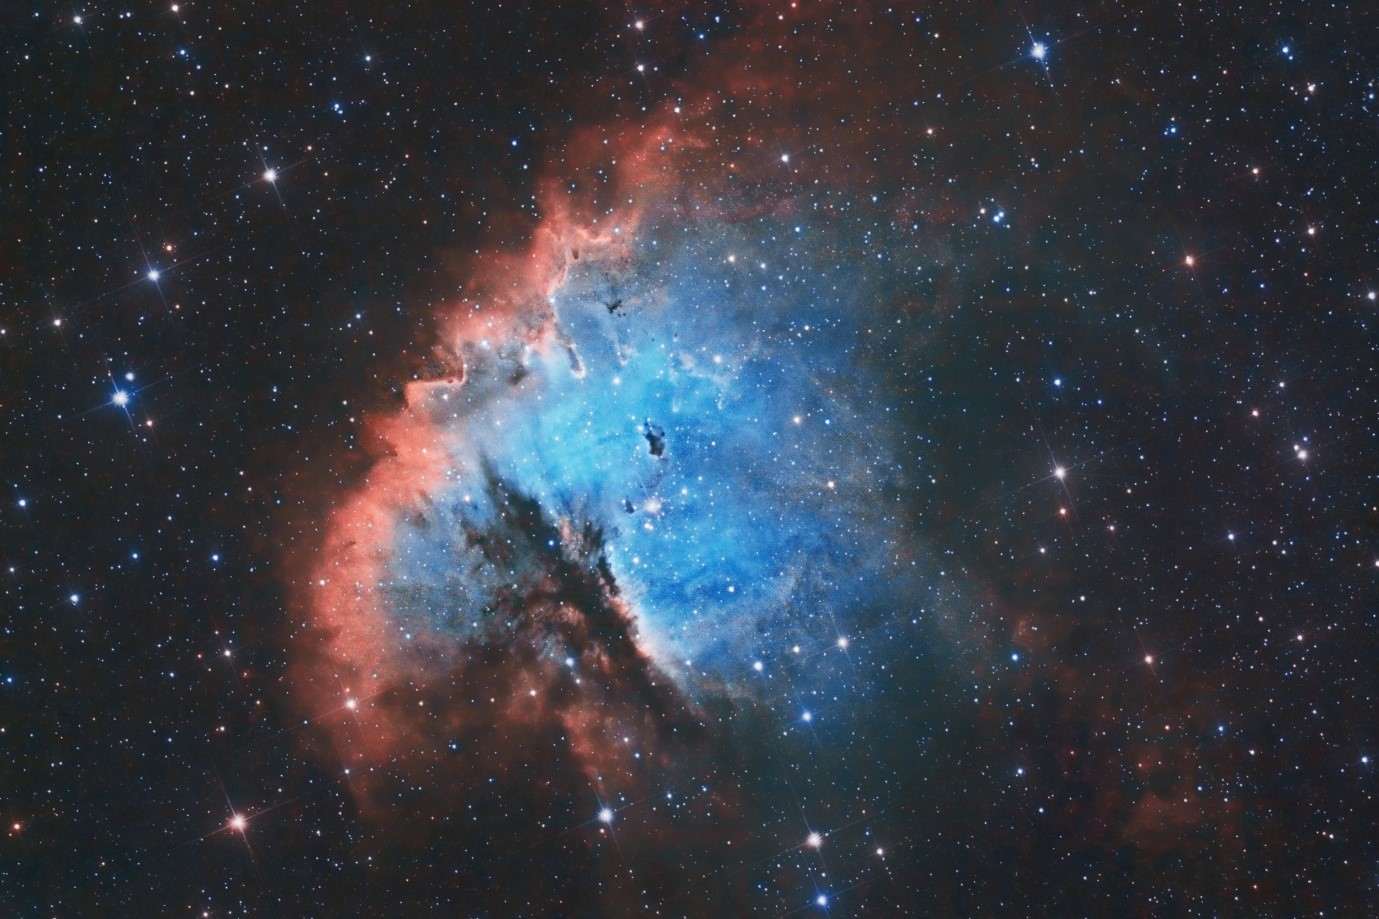
Deep Space Object (DSO) Imaging
And this is where it gets very technical! DSOs include star clusters, nebulae and galaxies. While the Moon and the planets in our solar system are very bright, DSOs are extremely dim, so finding them can be difficult.
Just about everyone has seen some of the fabulous images produced by the Hubble Space Telescope since it was first launched into space aboard the Space Shuttle Discovery in 1990. If you are awed by those images and want to take your own, the good news is that you don’t need to own a 2.4m-diameter telescope that you launch into space! You can do it all from the comfort of your own back garden. It’s not an easy task, but the results can be spectacular.
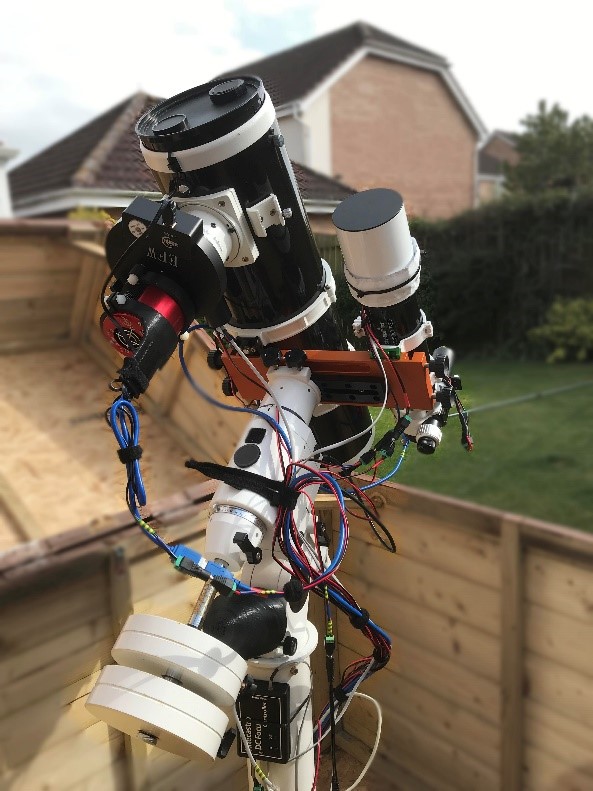
You will need a telescope mounted on an equatorial mount, as seen above. Once you have located the DSO (bear in mind that you might not be even able to see it because it is so dim), you will need to focus on it, then take long exposures in order to capture those few photons that have been travelling across space for the last few million years. If that wasn’t difficult enough, you will need to precisely track your subject while exposing—DSOs are constantly moving. You will have to collect as many photons as you can manage, only to end up with what may appear to be a very disappointing image.
Thought you had finished? This is where the fun starts! You will then have to ‘process’ your image to get the most out of it. You will use specialist software to stretch your image, enhance the colour and tease out the fine details.
The not-so-good news is that DSO imaging is not a cheap hobby. The images you see below were all taken on ‘budget’ equipment but, even so, an initial outlay in the region of several hundred to several thousand pounds should be expected if you want your very own imaging setup.
Get involved!
Want to learn more about astrophotography? You are welcome to come along to the West Yorkshire Astronomical Society observatory on a Tuesday or Friday evening, where you will have the chance to talk with fellow imagers (many just starting out) and try out scopes and cameras for yourself. The Society also runs a Young Astronomers Evening on the last Friday of every month. For more details, visit the West Yorkshire Astronomical Society website.
The West Yorkshire Astronomical Society meets at the Rosse Observatory, Carleton Road, Pontefract WF8 3RJ.
Stargazers, a display of images by members of the West Yorkshire Astronomical Society, is on display at the National Science and Media Museum until September 2019.
I,’ve already gotten good images of the moon on my phone.
Today I took some amazing pictures of the moon from Africa